18W ‘British Lead’ chassis
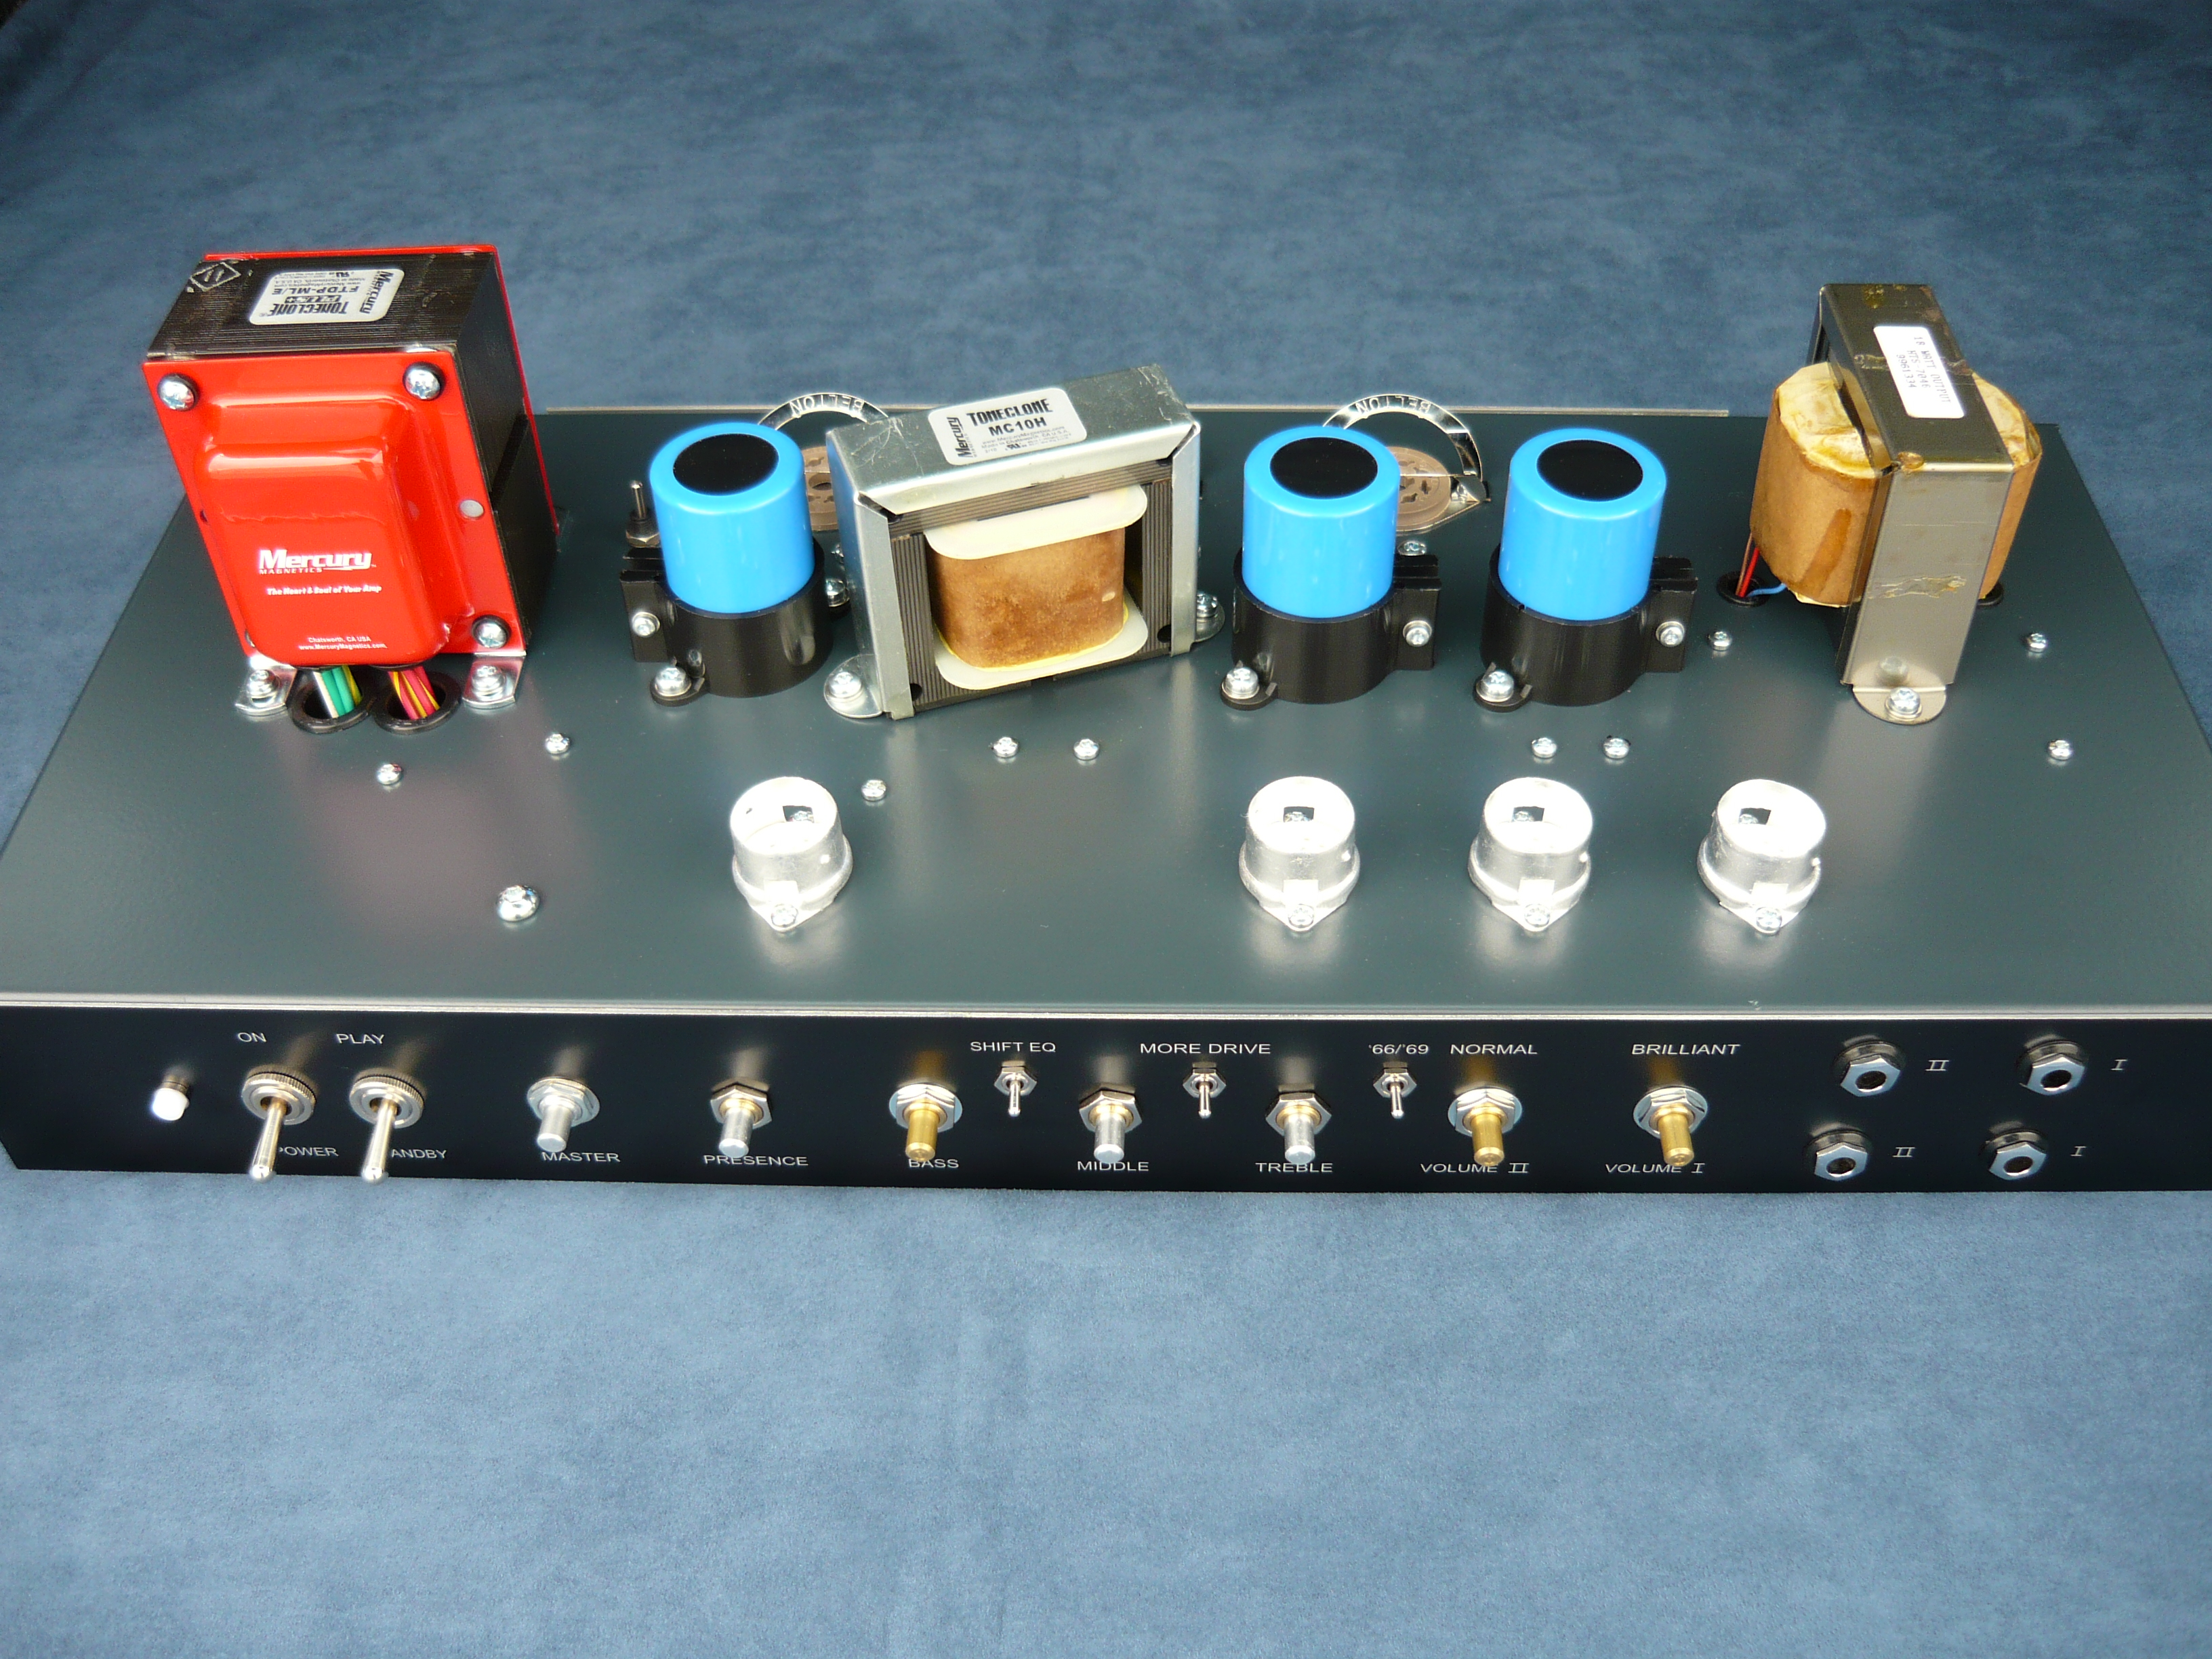
Welcome back to the blog after a long break of 3 months. We have been busy !Here is another in our occasional series of blogs where we publish a visual report of a custom-order amp build, in progress. This example shows a Richards Amplifier Company British Lead Series chassis underway for our good customer Greg, of Sydney. Greg has previously purchased our Expressionist and Blue Mood model amps, with matching Tone Cabinets.

18W ‘British Lead’ chassis
Greg has developed an appetite for vintage ‘British’ tones, but with the output scaled down to a more manageable 18 watts at full power, by employing a pair of 6V6GT output valves (tubes), in lieu of the more obvious choices, such as EL34’s, KT66’s or KT88’s. Rectification of the high voltage supply on this model is handled by a GZ34/5AR4 valve (tube), with excellent current production valves now also available from Tung Sol and Mullard.

18W ‘British Lead’ chassis
With this project, we are looking to create the broadest range of classic, vintage British tones possible – including those tones recorded by (for example) artists as stylistically diverse as Mark Knopfler (JTM45) or ZZ Top’s Billy Gibbons (JTM45/Plexi/JMP). To that end, we have included a trio of mini toggle switches on the front control panel to reconfigure both the ‘front end’ circuitry and the 3-band passive EQ as required to achieve ‘JTM45’, ‘Plexi’ or ‘Metalface’ voicings. The 2nd mini toggle switch actually switches an additional 12AX7 valve (tube) into the signal path to achieve the more aggressive ‘JMP’ or ‘JCM800’ voicing and gain structure.
18W ‘British Lead’ chassis
The control panel starts on the right hand side with the traditional 4 inputs, arranged as a pair of inputs for each preamp channel – ‘Brilliant’ and ‘Normal’. The preferred method of operation is to plug into the 1st channel, then use a short, high-quality jack-jack patch lead to cross connect to the 2nd channel. The ‘Brilliant’ and ‘Normal’ channels are now connected in parallel. The player then sets the desired balance between the two tonalities with the preamp volume controls. This is probably best done with the EQ set fairly flat (ie, 12 o’clock), then having balanced the volume controls – fine tune the amp’s voicing using 3-band passive EQ and the ‘active’ presence control.

18W ‘British Lead’ chassis
A mini toggle switch configures the 3-band passive EQ as per the early ‘blues’ JTM45 voicing, or the later (post 1968) ‘crunch’ voicing. The presence control functions as part of the power amplifier circuitry and adds emphasis to the upper-midrange and high frequencies. A good starting point is to set this control to the 12 o’clock position, then fine tune from there according to the acoustics of your playing environment.

18W ‘British Lead’ chassis
You could consider the balancing of the two channels as your ‘primary’ equalisation, and the tuning of the 3-band treble/middle/bass controls as your ‘secondary’ equalisation. Then the presence control adds further brilliance as required – in effect the amplifier’s ‘final’ equalisation. We think that a master volume control is absolutely essential on an amp like this, even though it was not provided on the original amps that inspired us all.

18W ‘British Lead’ chassis
Once you have found your ‘sweet spot’, mixing the preamp volumes and refining the EQ and voicing options available on this amp (as discussed in the paragraphs above), there is a reasonable chance that you will be playing at a volume that is considered excessive under the prevailing circumstances, hence the inclusion of our master volume to keep it all under control. The guitarist who prefers to play with the amp running wide open will appreciate the transparency of our master volume design when set to maximum clockwise rotation.
The master volume (MV) control actually functions as part of the power amplifer circuitry – ie, it is located post phase-inverter stage (PPI) in the signal path. The primary function is to manage the output levels as required, but when used specifically to generate distortion, its location means that every preamp valve (tube), including the 12AX7/ECC83 phase-inverter stage, is contributing to the end result. There are other benefits to this design approach as well. With the MV set to maximum clockwise, the amp (up to the point of power amp clipping) is delivering its cleanest, brightest and tightest tones. On the other hand, as the MV is rotated anti-clockwise, the effect of the global negative feedback loop is progressively minimised, and the amp loosens up and behaves much more like a vintage amp design, with a sound full of fat, warm ‘valvey’ character.
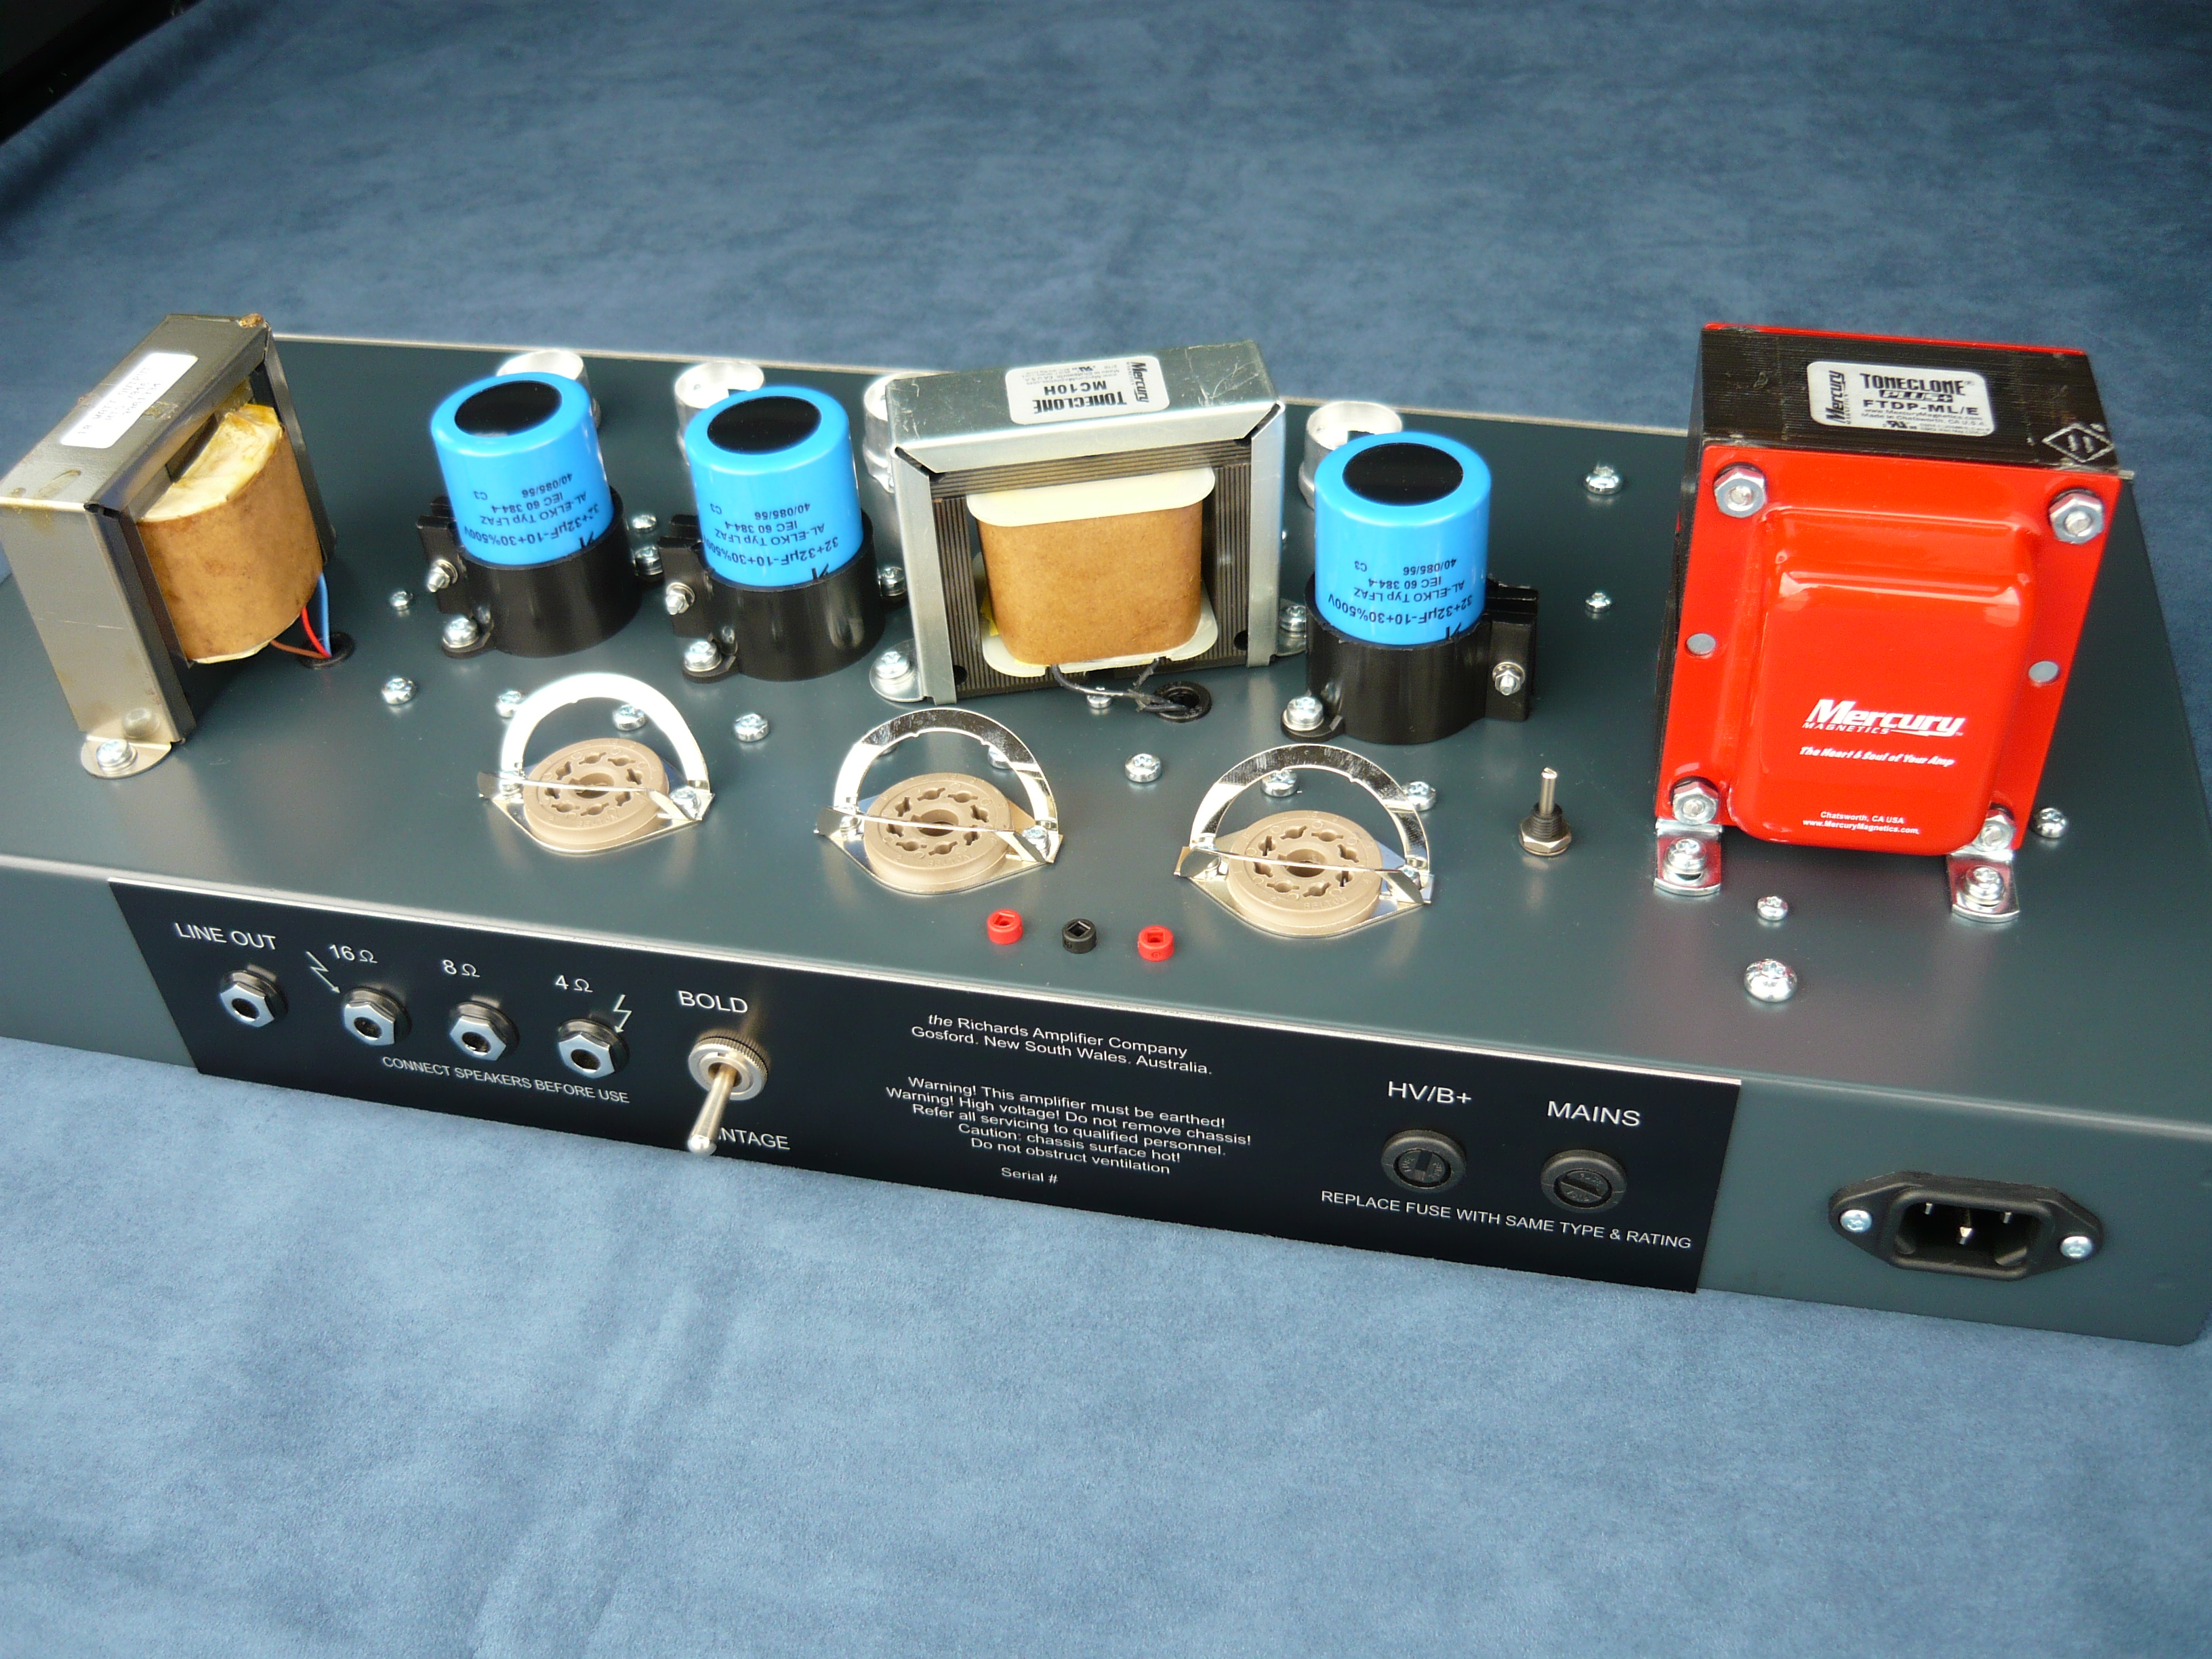
The remaining front panel controls include high-quality metal toggle switches for power on/off and standby/play functions, plus a power-on indicator. The rear panel controls/functions include mains and high voltage supply fuses, full-power/half-power switch (once again a high-quality metal toggle switch), output jacks for 16, 8 and 4 ohms, plus an earth-lifted output jack for line/recording, ie DI.
We will now be offering this amplifier model as a permanent fixture in our range of designs, with power output options of 18 watts (6V6’s), 30 watts (KT66’s), 40 watt club amp (EL34’s), 50 or 100 watts (EL34’s), 60 watts (KT88’s).
Thank you Greg, for your continued custom and enthusiasm for our amplifiers ! IR.

Leave a comment